Just as I recommend you individualize your mobility drills, you should customize the squat variations in the warm-up sequence. Before we direct you towards finding variations that will be most beneficial for you to start with, you should understand the difficulty of different squat variations. This will give you a better gauge of where you’re at, and provide something more concrete to work for.
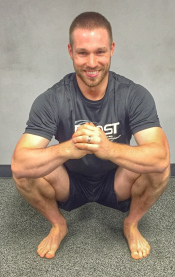
Let’s confirm that an “unassisted” squat is a barefoot air squat, which in itself increases the level of difficulty for any variation you are performing. I like to call this a “naked” squat. (Ok so yes, perhaps I should change the name as you may have some strange images running through your head, but “bare” with me here.) This means there is no equipment to offset and assist* the position. (Yup, shoes count as equipment.) Therefore when it comes to performing a squat with the quality we desire, especially within the foot position and extreme depth standards we’ve put forth, it is by far more difficult than any assisted squat. If you lack the slightest mobility in even one part of your body, it will be exposed with a barefoot air squat which is why it is perfect as a part of the assessment. Not only is it the ideal assessment squat variation, it is also the best variation to aim towards perfecting, or rather to chip away at and mold. The better and more comfortable this squat variation becomes for you, the more automatic and smooth the reception of your snatch and clean will be (especially WITH weightlifting shoes on).
Even though we are wanting you to perform your warm ups barefoot, all of our “go-to” variations in the sample sequence are still assisted, which decreases the difficulty level further. In this context, “assisted” will involve some sort of object, like a plate. The purpose of assistance is to create awareness of better quality and deeper positions (especially for those that are far away from that otherwise).
*Note on Assistance
To me it is the same idea as a track athlete implementing downhill sprints into their training. These will force a longer stride and faster turnover that they would never feel otherwise; performed frequently, and in combination with their regular training on the level surface, can teach them to run faster. A sprinter will benefit even more if they are also doing UPHILL sprints to increase strength and exaggerate the difficulty as opposed to a level surface. (The equivalent in squatting is performing elevated TOE squats, which increase mobility, comfort, and movement on a level surface – we’ll touch on these and how and why to use them more later.)
So, what squat variations do you need to be doing now? Did you give the sample sequence a try? Which of the “go-to” variations can you currently execute with quality? Here they are listed again:
- Extended Plate Squat w/Elevation* (Demo here)
- Bottom Squat Hold w/support (Demo here)
- Extended Plate Squat (no elevation) (Demo here)
*Note on Elevation
A couple things to consider when elevating your heels whether or not you have shoes on:1) Don’t be afraid to elevate your heels up to as much as 2 inches. You can use 15-pound “Hi-Temp” bumper plates, or a 15-kilogram elite training or competition disc to start out with. A little bit of extra elevation beyond say a 5-pound or 10-pound metal plate can make all the difference in you being able to successfully perform certain squat variations. Just remember, it’s not about staying there and using that amount of elevation forever, but a place to allow some good reps while you’re working on your assigned mobility, and a point of reference to progress from (i.e.,down in elevation over time).
2) Only one, and no more than two inches of your heel is on the surface you’re using to elevate with. This is important because any more than this will take away from the solidity of the feet in the set up (think “tripod” here, you want to be able to feel and use the heel part of that by that base location being solid on the elevation).
If quality is sufficient in all 3 go-to variations, then you can place a regular, barefoot air squat into 1 or 2 of the squat slots to get some good work in with the specific sculpture we’d like to perfect. That squat variation order might look like this:
- Extended Plate Squat w/Elevation
- Bottom Squat Hold w/Support
- Extended Plate Squat (no elevation)
- Bottom Squat Hold w/Support
- Air Squat (no elevation)
If you’re sufficient with that, then you can start experimenting with variations that are even more difficult. Examples include exaggerations of this base movement such as performing it with your toes turned in, wide feet (with toes turned in or out), feet together, or with your toes elevated.
A great sequence for the athlete who has good overall mobility is what I call “ARE Squats” (Awareness-Reality-Exaggeration). “Awareness” is using elevation to practice and feel something better/easier. “Reality” is performing the specific variation we are trying to solidify/improve (squatting on the level surface; NO elevation) to see where it’s at and how it feels, and to progress down from the heel elevation. “Exaggeration” is increasing the difficulty beyond the regular movement/position to “trick” your body into believing that “reality” is not so bad (think about how light the empty bar feels with any movement after performing that movement with maximal loads). Now, you’ll always go back to “reality” shortly after the exaggeration to compare and feel the difference from the first set with no elevation, and to hardwire the benefits.
ARE Squats: 1 Round, 5-Second Pause in Bottom/Rep
- Air Squat w/Elevation
- Air Squat (Level Surface)
- Air Squat w/Elevated TOES
- Air Squat w/Elevated TOES
- Air Squat (Level Surface)
If quality is sufficient in 2 go-to variations, then move forward with the original sample sequence. The only thing to consider adjusting would be reordering the squats to where the most difficult variation for you is second to last (to get a similar effect as the ARE squats). For example, if you are good with “extended plate squat with elevation” and “bottom squat hold with support” but you struggle with “extended plate squat (no elevation)” then your sequence could change to the following:
- Extended Plate Squat w/Elevation
- Bottom Squat Hold w/Support
- Extended Plate Squat w/Elevation
- Extended Plate Squat (no elevation)
- Bottom Squat Hold w/Support
If quality is sufficient in only 1 of them, then you’ll use that one in 4 of the 5 slots in your sequence. For example, if you are good with “extended plate squat with elevation” only, and the next best one is the bottom squat hold with support, then your variations could change to the following:
- Extended Plate Squat w/Elevation
- Extended Plate Squat w/Elevation
- Extended Plate Squat w/Elevation
- Bottom Squat Hold w/Support
- Extended Plate Squat w/Elevation
If you are unable to confirm sufficient quality with any of them (and remember this is with you having already tried elevation with each variation except for the support squat), then experiment with any other variation you can think of in pursuit to find at least one you can use to start with and grow from. Examples include: kettlebell goblet squat, front squat, Frankenstein squat, back squat, and so on ‒ note any of those would likely need to be with elevation to start out.
I’ve worked with a few athletes in this exact spot in the past and one in particular taught me the very valuable lesson of being more creative (thinking outside the box by looking at ALL other variations), and even more disciplined in regards to the quality level.
His mobility assessment indicated the two major areas we would be working on in his sequence were internal hip rotation and t-spine. He had kyphosis (“hunchback” in appearance) in all of his squats, and as is typical of this issue, even in the standing position. Due to this, he wasn’t able to show me what I felt was sufficient quality for any of the “go-to” variations, but we moved forward with “extended plate squat w/elevation” and “bottom squat hold w/support,” as they improved the rounding in his upper back the most. (He continued this along with the hip rotation and t-spine mobility drills.) With addressing the internal hip tightness, his depth was improving, but still I wasn’t comfortable with the reps he was performing in regards to his upper back. During this time the only weighted squat we were doing was Frankenstein squats (mostly with elevation) as this also allowed his upper back to maintain a slightly better position.
One day I happened to see him doing overhead squats with an empty bar. (We had been doing light power snatches, but I had not seen him in the bottom of a squat with the bar overhead up to this point). Before my initial reaction of lecturing him on skipping steps commenced, I noticed that his upper back was STRAIGHT! Keeping the bar overhead as he squatted down was forcing what I assumed was not possible for him. So, the experimenter in me immediately took over and assigned elevated heel overhead squats as the variation he would use for most of the reps in his warm-up sequence. So, he was getting reps in with the desired quality (in combination with his mobility drills), and we were able to progress down in elevation. He was able to progress into other variations over time, ultimately leading to the ability to perform full-depth back and front squats maintaining a straighter upper back AND better quality in the reception of the snatch and clean.
So, what if there is STILL no quality to be found? Let’s say you’ve exhausted all squat variations with high elevation and it’s just not happening for you. No worries, we don’t have to look too much further because all that is really left is to limit depth. FINALLY we’ll consider not letting you go all the way down! I want to take a second to highlight that limiting depth is LAST resort, NOT the “knee-jerk reaction” that is unfortunately the typical go-to in the fitness community. In this sequence, we’ll limit depth with a box (or other object) instead of just guessing or a coach yelling “stop.” This will allow you to know exactly what depth you are reaching, give you a goal in that regard, and a place to progress down from.
I want to confirm that needing to use a box within this squat warm-up sequence is rare. I believe most athletes should be able to create a sequence without going to this extreme. (I just don’t want this to become an unwarranted overdiagnosis the way that I feel things like “butt-wink,” “valgus,” “anatomical variations,” etc. have become.) Of course, if this is truly where you’re at, then by all means please use the box, BUT have that plan and the desire to progress away from the box. We’ll push to lower the height of the object you’re squatting down to over time and aim for removing the box, and using heel elevation and on down from there.
If you need to limit depth, your variation might look something like this:
- Extended Plate Squat to 20” Box
- Extended Plate Squat to 20” Box
- Extended Plate Squat to 20” Box
- Extended Plate Squat to 16” Box
- Extended Plate Squat to 20” Box
An example of a progression downward would be:
- Extended Plate Squat to 20” Box
- Extended Plate Squat to 16” Box
- Extended Plate Squat to 16” Box
- Extended Plate Squat w/Elevation
- Extended Plate Squat to 16” Box
And then keep surging forward (or rather DOWN) from there.
If you are an extreme case like the example above, or if your weighted squats are not up to par in regards to foot position, range of motion, and/or quality, then understand that a part of your initial 4-week commitment is to hold off from those weighted squats and/or any other compensated squatting action. (The exception here is if you are using a certain amount of weight to assist the position/depth.) Examples of other squats to limit are goblet squats, wall balls, and of course squat snatches/cleans. Not only are you not yet optimally prepared, but each rep you perform in a compensated fashion on the reception of a squat snatch or clean is going to reinforce and strengthen that compensated action (i.e., a partial depth catch and wide/turned out foot position with a forward/rounded torso). In other words, you’ll be working against yourself by canceling out good reps with bad ones.
Once you’ve determined your squat/mobility warm-up sequence, it should be your general warm up at least 4 days/week, for 4 weeks. With the squat variations in the warm up, of course we want to reinforce quality. “Quality” means the standards we’ve defined for tripod foot, depth, knee alignment, and core tension are ALL maintained (don’t forget as well that you should be. But, it is ok to veer from the above-defined quality for some of the reps, and though that might be a bit confusing, I am stating it with purpose: We want you to continually test yourself in this way on a FEW of the reps (maximum one set) with one of the squat variations you are using each day. This will ensure you are regularly finding quality at the highest difficulty level possible, and help you progress up or even modify back to an easier variation as needed throughout the process. Again, we are only talking about a few reps each day, so if you are not able to maintain quality with most or any of our “go-to” squat variations, you’ll need to experiment a little and change up the variations you are using to optimize your sequence to reach the appropriate amount of quality within your warm ups.
Remember, the idea is to assess, assign, and repeat, so after 4 weeks of the warm-up sequence (again performing it as your general warm up at least 4 days/week), you’ll need to re-assess and move forward accordingly. We recommend the warm-up sequence being an ongoing part of your journey moving forward, it will just be continually adjusted to fit what you most need through a given period.
Until next time,

Chad Vaughn,
2-Time Olympian, USAW
_______
With
Dr. Aaron Horschig, PT,
DPT, CSCS, USAW
_______

I find it helpful to understand the difficulty levels of different squat variations.
LikeLike